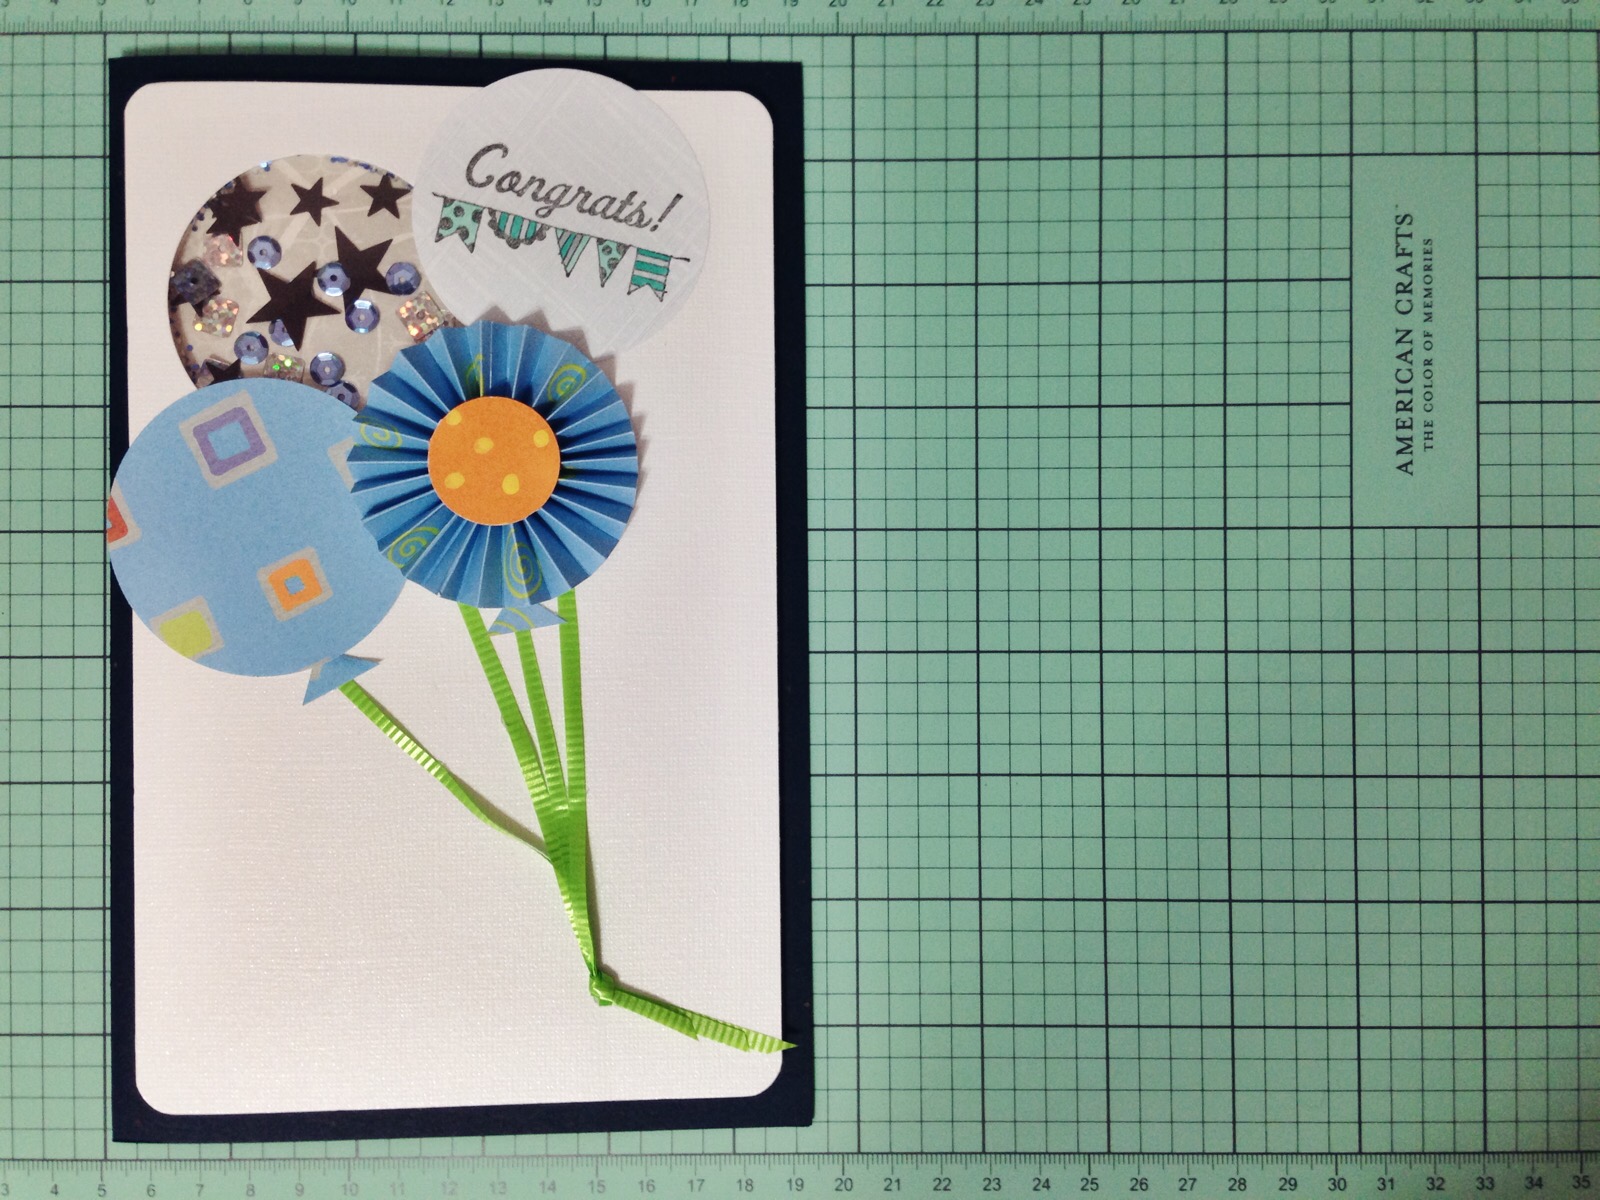
My younger brother graduated!!! I’m so proud of him! Again, I didn’t know how I was going to decorate a card for a teenage boy. But it came to me one evening that I could use my large circle puncher to create a shaker card. With any shape puncher, you’re pretty much restricted to the edges of the paper and that’s how I came about going with the balloons idea.
I used a dark navy blue card stock with little brown, yellow and red specks as the card. For the front, I trimmed down this white card stock with pearly finish and used my circle puncher to create a window.

I cut out a square piece of acetate that was part of packaging of one of my art supplies that I was going to toss away. Used a permanent dotted tape runner to adhere the acetate to the back of the punched out window. I also cut out a square piece of silver-colored with white design card stock to use as the background of the window.

I took out my roll of double-sided adhesive foam tape and sorta eyeball the circumference of circle window and cut the length I needed. I’m sorry I got ahead of myself and forgot to take a picture of what it looked like before I adhered the silver-colored square piece, but basically I removed one side of the double-sided adhesive foam tape and taped it down around the circle window. Make sure the ends meet up nicely or else you will have loose bits (glitter, sequins etc.) falling out. Then pour in glitter, sequins or whatever you want to use in that window. Carefully peel away the other side of the double-sided adhesive foam tape and gently (but firmly) press down the silver-colored square piece over.

This is what it the white pearly front of the card looks like from the side with the silver-colored square piece attached.
On the back of that piece, I added strips and squares of double-sided adhesive foam tape in order to adhere to the dark navy blue card. Also this makes the card even, since there’s the shaker window. Before peeling of the other side of the double-sided adhesive foam tape, I ran my permanent dotted tape runner all over the back of the silver-colored square piece.

I took a lightweight white paper and trimmed down to put inside the card. I stamped a congrats message and waited for it to dry, before taping it down with the tape runner.

For the balloons I used the same circle puncher and punched out scrapbook paper I had. Before adhering them, I placed them around until I liked the way it looked. I measured and cut some ribbon to be the strings of the balloons. I tied a knot and used my hot glue gun (put tiny dots) to glue the ribbons down. Then I adhered the balloons. Finally I cut little triangles for the balloons in front and glued them where the knots of the balloons should be.
This was super fun to make and also another way to make a shaker card if you don’t have a die-cut machine to cut out windows.

Leave a comment